Keyline Geometry and Keyline Plowing
Geometry and water harvesting? How are these related?
I’ve been working in the field of land regeneration for the past decade and to be honest Keyline geometry was quite confusing for me to understand before I acquired a keyline plow and began using it in the Central Texas Hill country. The videos and articles attached below are vastly easier to understand than the books I read direct from P.A. Yeomans who invented the Keyline system back in the 1950’s. This is my attempt to simplify how and why we use it as simply as possible. For greater understanding, refer to the links at the end of this article to see the many giants whose shoulders we stand on.
The Keyline plow is a tool, like any other tool, it is to be used under the right context and circumstance. Ideally it is used in a pulsed relationship with holistic planned grazing as shown in this link.
Intensive Rotational Grazing_Whole Systems Design Carbon Farming
The keyline plow used in the Intensive Rotational Grazing context is not better or worse than the use of ponds or berms and swales to harvest water, just a different, complementary method of opening up the land to help water infiltrate rain, manure, and minerals into the deeper soils in order to loosen the subsoil and build topsoil rapidly.
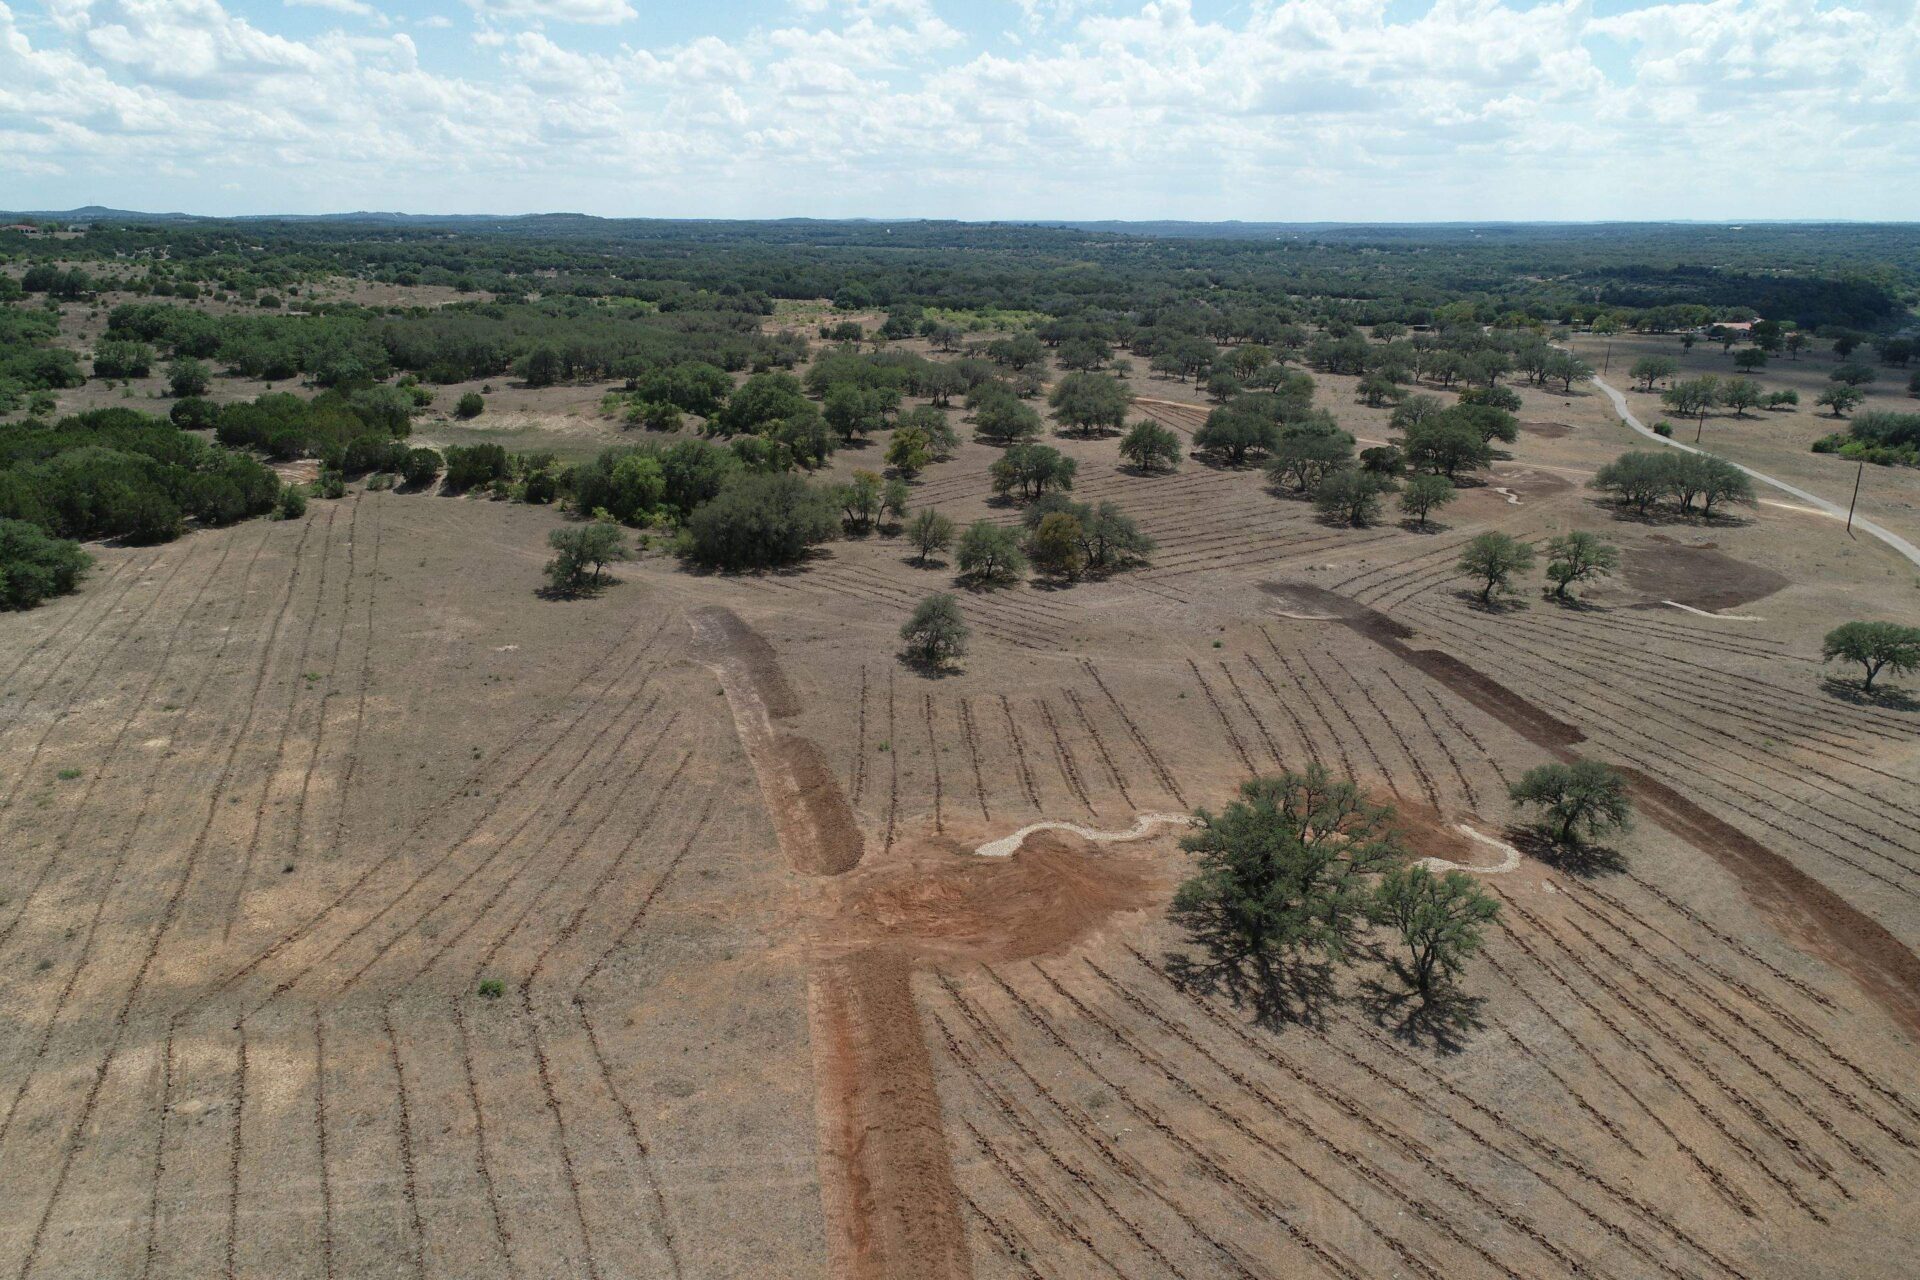
Rips (soil penetrating slits) are placed not on elevation contour level but tilting slightly downhill toward the ridge to encourage water to passively flow from valleys down and out to ridges. Water is naturally moving perpendicular to contours and racing toward the valleys when it rains, so these rips gently redirect the flow of water back to the ridges to slow the flow of water and evenly distribute it in the subsoil. That water will continue to move downhill with gravity but, with the addition of the Keyline rips, it is rehydrating the ridges which tend to dehydrate due to their steeper slope if they are left alone and the valleys, which tend to flood and become unusable if left to their own pattern. This technique provides a very even distribution of water across a landscape.
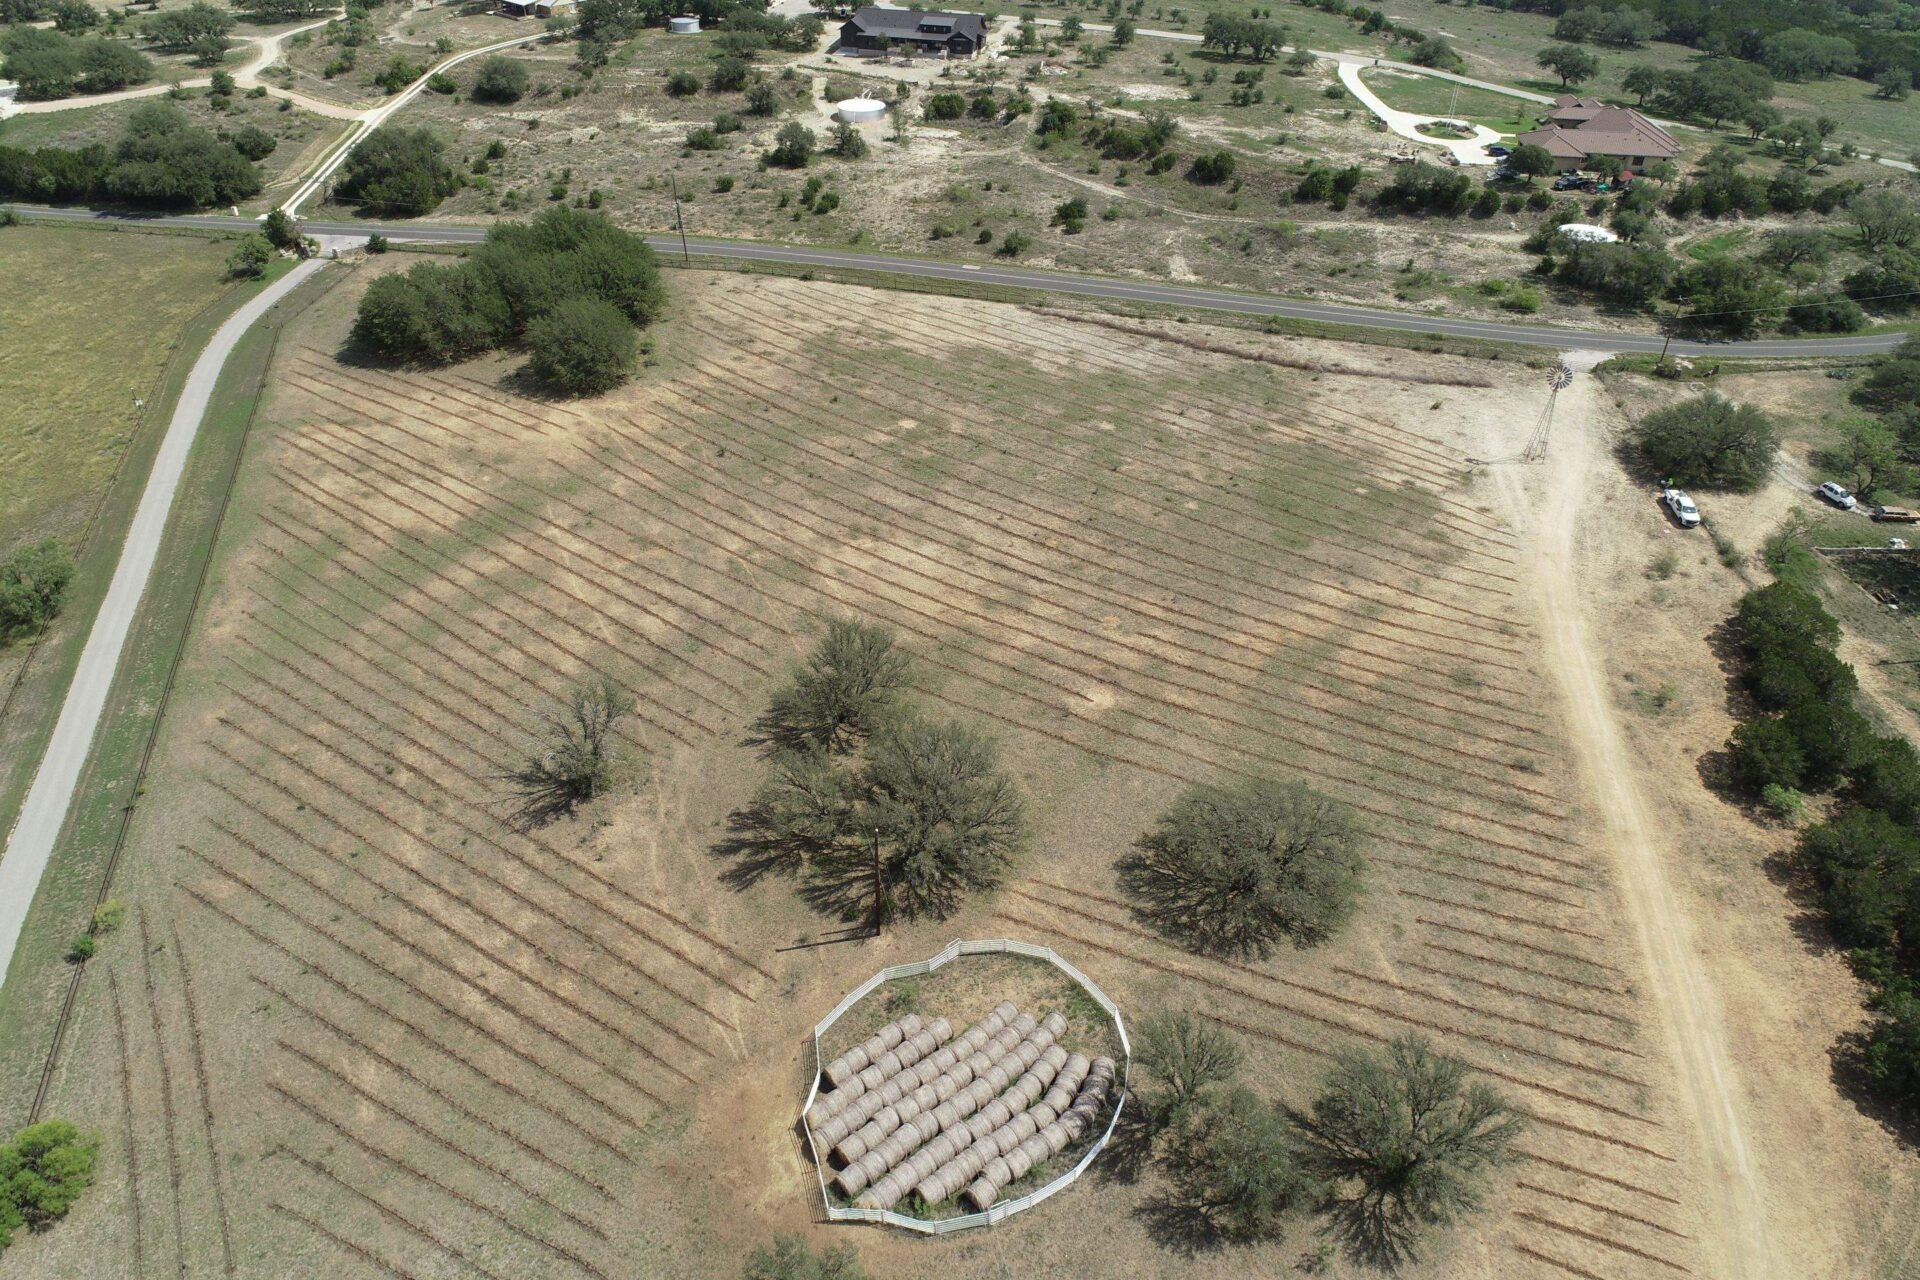
The plow itself is a combination of a coulter, a serrated wheel that slices through the sod and grass root layer, followed by a very unique sharp and strong shank that lifts soil from below and opens soil. It does not turn soil over like most plows that we think of. It makes underground micro swales approximately 6” to 18” deep x 2” wide for water to fill and slowly sink into the earth. We drive this plow as rapidly as possible so as not only to slice the land open like a scalpel but to also create a blast wave in front of the shank that ripples and fractures the soil around the incision, creating openings in the soil space for more water to infiltrate. One of the many benefits is that after 3 to 4 rains, the rips fill in and settle so that the smooth pasture aesthetic is maintained.


Once we have decided to use this tool for a particular project the process goes like this: First, Ellie, our maps master, generates a LiDAR contour map of the property that shows the contour lines at 2’ intervals so that we can take a look at the land shape. Then we find the valleys (V-shaped contour lines pointing uphill) and start drawing rough lines slowly drifting downhill toward the ridges (V-shaped contour lines pointing downhill). Once we have a general idea of land shape, we may need to conduct some strategic clearing onsite to be able to get more rips in select areas. We prioritize creating several rips as high on the property as possible to slow water before it becomes a destructive liability instead of a properly utilized asset.
Surveying is then conducted on the ground with a laser level and, instead of placing flags as guide lines on contour, the survey lines are placed slightly off contour, meaning that they drift downhill from valley out toward ridges at around a 2% slope. With the laser level we place our first flag in the valley bottom, looking out toward the ridge, then walk 25’ on contour and raise the laser level receiver 6” until it reads level again, then we place the flag. We repeat this until we run out of drivable space for a tractor. To sort out our slope we need to know the rise over run. (Vertical/Horizontal= slope) 25’ run x 12” = 300” run (horizontal length) with a 6” rise (or drop), 6’:300’ = 0.02 = 2% grade. We repeat this process on all lines placed on the ground.
We tend to put in a main flagged line in the middle of the land feature and remain parallel to that line for 4-10 rips uphill and 4-10 rips downhill, the number of parallel rips are determined by the land shape. If the land shape gets less steep or more steep so that the rips feel like they are starting to become flat or increase to a 5% or more grade, then it is time to stop using that reference flag line and move the plow to a new area and reset the slope. Refer to the link “Understanding the Application of Keyline Geometry” at the end of this article for a very clear visual simplification of this system.
For this particular property context, we put the keyline rips 9’ apart so that a tractor with an implement could drive in-between the rips. We followed the plowing with towing a manure spreader to cast out 240 tons of Paramagnetic basalt rock dust, which we purchased for $10 per ton direct from the mine. We follow this mineralizing with a no-till-drill seeder driven in between rips to plant native pasture grasses and cool season cover crop. The cover crop will provide an annual fast growing mulch layer that will act as a nurse layer so that the native perennial pasture grasses can take their time coming up behind them. Once those seeds come and go to seed, liberating a new locally adapted seed bank, then we will begin to holistically graze a mixed herd of horse and cattle to further repair this land.
We chose to invest in a used 2-shank plow with coulters from https://yeomans-plow.com/ so that we can operate it with a smaller onsite tractor. In rocky terrain we tend to use the single shank as it makes a very clean rip and bounces off giant boulders as opposed to pulling up craters when large stones get caught between the two shanks. A 25 HP motor is required to pull each shank, we are able to share the plow with many clients who are able to use their tractors because it is such a small plow. For clients who wish to use the keyline plow and are either wanting to do the work themselves to have the experience and relationship with their land or to save cost on labor, we can typically rent the plow to landowners. We will spend a day in transport, unloading, attaching, and tilting the plow appropriately and one or two days teaching our client how to use it while surveying initial lines with appropriate geometry. After all this prep work is complete, we can then set them loose with it on their own. Distributing the knowledge of earth repair and saving clients costs on hourly operators and tractor rentals works out for all of us.
Our efforts at the example site resulted in 1,079 Keyline rips equaling 31.28 total miles.

Supporting Documents & Resources
PDF article with clear visuals of Keyline geometry:
Video:
Articles from field experts:
- Keyline Design Transforms Farm Water Management | EcoFarming Daily
- Keyline Design – RIDGEDALE FARM AB
Courses on Keyline geometry, Go straight to the source…the Regrarians
- Webinar – 2. Geography – Keyline Geometry Basics – Regrarians
- Keyline® Practice: Soil Health and Drought-Resilience for 21st Century Farms and Landscapes – Holistic Management International
Purchasing New or Used Yeomans Keyline plow in the United States
- https://yeomans-plow.com/
- Noah 805-440-3367
- pacificorganics@iCloud.com